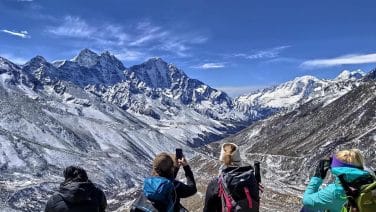
Everest Base Camp packing mistakes usually begin with footwear, layering, bag weight or equipment that has not been tested before departure. At high altitude, a small gear problem can become harder to manage because the route is remote, temperatures change quickly and replacement choices become limited above Namche Bazaar.
This guide explains seven preventable packing problems and the practical checks to complete before flying to Lukla. Use it alongside your operator’s final equipment list, because required warmth, sleeping-bag rating and porter weight limits can vary by season and package.
Everest Base Camp packing list at a glance
- Bags: A porter duffel within your confirmed allowance, a comfortable daypack, and dry bags or waterproof liners.
- Footwear: Well-fitted hiking footwear tested on long walks, camp shoes, and moisture-managing trekking socks.
- Layers: Synthetic or merino base layers, fleece, insulated jacket, waterproof shell, trekking trousers, and waterproof over-trousers.
- Cold and sun protection: Warm hat, gloves, neck gaiter, sun hat, UV-protective wraparound sunglasses, broad-spectrum sunscreen, and SPF lip balm.
- Sleep system: A sleeping bag with a comfort rating appropriate for your month and itinerary, plus a liner if useful.
- Health and hygiene: Personal prescriptions, a compact blister/first-aid kit, toiletries, hand sanitizer, and your clinician’s travel advice.
- Trail essentials: Headlamp, spare power, reusable bottles, trekking poles if used, passport/documents, and snacks that you have already tested.
Confirm the final equipment list, porter allowance, Lukla-flight baggage allowance, and any provided rental gear with your operator before departure.
Whether this is your first high-altitude trek or you’re a seasoned hiker, these insights will help ensure your EBC adventure is remembered for the right reasons. For broader planning, compare this packing advice with our Everest Base Camp difficulty and preparation guide and our breakdown of Everest Base Camp trek cost.
Table of Contents
Mistake #1: Buying Hiking Boots Too Late
Why Untested Footwear Causes Problems
New or poorly fitted footwear can create hot spots, blisters, bruised toes, or instability during repeated walking days. The important test is not a fixed break-in period: it is whether the footwear fits securely, works with your trek socks, and remains comfortable on long walks, climbs, and descents.
Buy footwear early enough to exchange or adjust it if problems appear. Before departure, complete several progressively longer walks and at least one representative full-day hike with the socks, insoles, and daypack you expect to use.
Why This Happens So Often
Day hikes do not always reveal the pressure points that appear during repeated trekking days. Test footwear on consecutive walks where possible, including descents, because toes and heels can move differently when fatigue and pack weight accumulate.
Additionally, many trekkers get caught up in the excitement of planning their adventure and focus on the “fun” aspects like choosing their camera gear or researching tea houses, leaving the practical essentials like proper footwear until the last minute.
The Solution: A Proper Boot Timeline
8-10 Weeks Before Departure:
- Research and purchase your boots
- Visit a specialty outdoor store where staff can properly fit you
- Shop in the afternoon when your feet are naturally swollen (mimicking altitude conditions)
6-8 Weeks Before Departure:
- Begin breaking in with 30-minute walks around your neighborhood
- Wear the same socks you’ll use on the trek
- Pay attention to pressure points and hot spots
4-6 Weeks Before Departure:
- Increase to 2-3 hour hikes on varied terrain
- Test boots on rocky surfaces similar to EBC trail conditions
- Consider hiking with a loaded backpack to simulate trek conditions
2-4 Weeks Before Departure:
- Complete at least one 6-8 hour hike in your boots
- Test in different weather conditions if possible
- Make final adjustments to lacing techniques
Pro Tips From Our Guides
- Choose fit, not a universal size-up rule – Allow adequate toe room and test the footwear with your actual trek socks; sizing varies by brand, foot shape, and lacing system.
- Bring your actual trek socks when trying on boots – Don’t rely on the thin socks provided by the store.
- Consider custom insoles – If you have foot issues or want extra comfort, invest in quality insoles designed for multi-day hiking.
- Test your boots’ waterproofing – The EBC trail includes river crossings and potential snow. Ensure your boots can handle moisture.
Mistake #2: Overpacking “Just in Case” Items
The Weight Reality Check
Porter allowances and Lukla-flight baggage limits are not interchangeable, and they can vary by operator, airline, and package. Confirm both limits in writing before packing. Weigh your packed duffel and daypack at home so you have time to remove duplicates or move essential items appropriately.
Overpacking also makes gear harder to organize and can increase costs or create delays at the airport. Prioritize the layers, sleep system, footwear, medication, and weather protection specified for your departure; treat optional electronics, duplicate clothing, and bulky toiletries as secondary.
The Most Common Overpacking Culprits
Clothing Excess:
- More underwear than your planned rotation and laundry access require
- Multiple backup shirts and pants
- More sock pairs than your planned rotation and drying opportunities require
- Bringing clothes for every possible weather scenario
Entertainment Overload:
- Multiple physical books (your phone/e-reader works just fine)
- Excessive charging cables and adapters
- Gaming devices and accessories
- Printed materials and maps (most are available digitally)
Toiletry Overkill:
- Full-size bottles instead of travel sizes
- Multiple backup toiletries “just in case”
- Excessive medical supplies for minor issues
- Beauty products that won’t be used at altitude
The Smart Packing Solution
Use a purpose-and-weight check: Lay out every item, confirm what it is for, remove unnecessary duplicates, and compare the final weight with your confirmed porter and flight allowances.
Embrace Multi-Use Items:
- Phone charger that also works for your camera
- Bandana that serves as towel, headband, and first aid supply
- Merino wool shirt that works as base layer and casual wear
- Trekking pants that convert to shorts
Kathmandu Shopping Strategy: Kathmandu has many outdoor and general-supply shops, but price, quality, sizing and authenticity vary. These are usually easier to replace locally than critical fitted or safety-related equipment:
- Basic toiletries (shampoo, soap, toothpaste)
- Batteries and basic electronics
- Snacks and energy bars
- Replacement gear if needed
Weight Distribution Wisdom: Keep your daypack as light as practical within your itinerary and operator guidance. Test it on a long walk and carry only day-access essentials such as water, snacks, rain gear, a warm layer, personal medication and a small first-aid kit.
Mistake #3: Choosing Cotton Over Technical Fabrics
Why Wet Cotton Is a Poor Base Layer
Cotton absorbs moisture and dries slowly. When a cotton base layer becomes wet from sweat, rain, or snow, it can leave you cold during rest stops or after the temperature drops. For clothing worn next to the skin, synthetic or merino fabrics are usually easier to manage because they move moisture and dry more quickly.
This does not mean every cotton item is automatically dangerous. The practical mistake is relying on cotton as your primary base layer or only warm layer when cold, wet, or windy conditions are possible.
The Science Behind the Problem
At altitude, your body works harder to maintain temperature. Cotton absorbs moisture but doesn’t wick it away from your skin. Instead, it holds that moisture against your body, creating a cooling effect through evaporation—a problem when conditions cool sharply or you stop walking.
Drying time depends on fabric weight, weather, ventilation, and how wet the garment becomes. Pack enough quick-drying layers to change out of damp clothing and keep an insulating layer dry for stops and evenings.
The Technical Fabric Solution
Base Layers – Your Foundation:
- Merino wool: Natural odor resistance, temperature regulation, comfortable against skin
- Synthetic materials: Quick-drying, durable, often more affordable than merino
- Avoid: Cotton t-shirts, cotton underwear, cotton long johns
Socks – Your Foundation’s Foundation:
- Merino wool blend with cushioning: Provides warmth, moisture management, and comfort
- Consider liner socks: Thin synthetic or silk liners can prevent blisters when worn under hiking socks
- Avoid: Cotton socks, fashion socks, anything without moisture-wicking properties
Mid-Layers:
- Synthetic fleece or down: For insulation when temperatures drop
- Softshell jackets: For wind protection and light insulation
- Avoid: Cotton hoodies, cotton sweaters
Budget-Friendly Technical Alternatives
You don’t need to spend $200 on a merino wool base layer. Here are cost-effective options that perform nearly as well:
Affordable Merino Alternatives:
- Uniqlo Heattech line: Excellent moisture-wicking at fraction of the cost
- Decathlon’s Forclaz range: Quality synthetic options under $30
- REI Co-op brand: Good performance-to-price ratio
Where to Shop in Kathmandu: Thamel has outdoor shops and rental services, but product quality, sizing, authenticity, and temperature ratings vary. Inspect critical equipment carefully and test it before leaving Kathmandu:
- Branded equipment from an authorized retailer when authenticity and warranty matter
- Local outdoor shops with surprising quality
- Rental options for expensive items like down jackets
Mistake #4: Inadequate Sun Protection Gear
The High-Altitude UV Reality
UV exposure generally increases with altitude because there is less atmosphere to absorb radiation, and snow can increase exposure through reflection. The exact intensity varies with cloud, season, time of day, and ground conditions. The World Health Organization’s UV guidance recommends protective clothing, shade, sunscreen, and eye protection rather than relying on temperature or cloud cover as a guide.
For the EBC route, carry protection where you can reach it during the day: UV-rated wraparound sunglasses, a sun hat, broad-spectrum sunscreen, and SPF lip balm. Reapply sunscreen according to its label and after heavy sweating.
The Most Commonly Forgotten Items
Lip Protection: Wind, dry air, and UV exposure can quickly irritate lips. Carry an SPF lip balm and reapply it according to the product instructions.
Eye Protection: Choose UV-rated wraparound sunglasses that limit direct and side exposure, particularly where snow and ice increase glare.
Skin Protection: The combination of intense UV and dry air creates perfect conditions for severe sunburn, especially on your nose, cheeks, and any exposed skin around your clothing edges.
The Complete Sun Protection System
Essential Sun Protection Gear:
High SPF Lip Balm:
- Minimum SPF 30, preferably SPF 50+
- Pack at least 2 sticks (one for day pack, one for main bag)
- Consider zinc-based formulas for extra protection
- Reapply according to the product label and after eating or drinking
Proper Sunglasses:
- 100% UV protection (both UVA and UVB)
- Category 3 or 4 lenses for high-altitude conditions
- Wraparound style to prevent side glare
- Consider glacier glasses with side shields above 4,000m
Sun Hat with Full Coverage:
- Wide brim that protects face, ears, and neck
- Adjustable chin strap (mountain winds are strong)
- Consider hats with neck flaps for extra protection
- Lightweight, quick-dry material
High SPF Sunscreen:
- Minimum SPF 50+ for face and exposed skin
- Zinc oxide stick for nose and cheekbones
- Waterproof/sweat-proof formulation
- Reapply every 2 hours, more if sweating heavily
Pro Tips From High-Altitude Guides
- Start sun protection from day one – Even in Kathmandu and during the flight to Lukla, begin your sun protection routine.
- Double up on lip protection – Many experienced trekkers carry both SPF lip balm and a zinc stick for extreme conditions.
- Don’t forget your ears and neck – These areas are commonly missed and extremely painful when burned.
- Consider a buff or neck gaiter – Provides extra coverage and can be pulled up over your nose and mouth in windy conditions.
Mistake #5: Wrong Sleeping Bag Temperature Rating
Match the Bag to Your Departure
Nighttime conditions become colder as the route climbs, but the temperature you should plan for depends on the month, current forecast, lodge conditions, and your own sleeping comfort. Do not choose a bag from a generic “extreme” temperature claim or one undated weather figure.
Ask your operator for the recommended comfort rating for your departure and whether a suitable sleeping bag is included, loaned, or rented. Test the bag, liner, sleep clothing, and compression sack before the trek.
Understanding Temperature Ratings
Comfort Rating vs. Survival Rating:
- Comfort Rating: The temperature at which an average woman can sleep comfortably
- Limit Rating: The temperature at which an average man can sleep for 8 hours without waking from cold
- Extreme Rating: The survival temperature (not comfortable sleeping)
Always choose based on comfort rating, not limit or extreme ratings. Sleep quality directly affects your body’s ability to acclimatize and recover.
The Right Sleeping Bag for EBC
Selection checks:
- Comfort rating: Match it to the operator’s current recommendation for your month; do not rely on the lower “extreme” rating.
- Fit: Make sure the bag is long and wide enough without excessive empty space.
- Fill type: Down is highly compressible; synthetic insulation can be easier to manage if damp.
- Condition: Check the loft, zip, hood, foot box, and compression sack before accepting a rental.
Down vs. Synthetic for EBC Conditions:
Down Advantages:
- Superior warmth-to-weight ratio
- More compressible for packing
- Longer lifespan with proper care
- Better for dry conditions at higher elevations
Down Disadvantages:
- Loses insulation when wet
- Takes longer to dry
- More expensive
- Requires more careful maintenance
Synthetic Advantages:
- Maintains insulation when damp
- Dries faster
- More affordable
- Easier to care for
Synthetic Disadvantages:
- Heavier for equivalent warmth
- Less compressible
- Shorter lifespan
- Bulkier to pack
Smart Shopping and Rental Options
Buying or renting: Both can work. Prices, brands, cleaning practices, and bag condition change, so inspect a rental in person and confirm its actual comfort rating. If a bag is supplied with your trip, verify the model or rating before deciding what else to bring.
What to Look For in Rentals:
- Recent cleaning and maintenance records
- Proper compression sacks included
- No visible damage to shell or zippers
- Appropriate temperature rating clearly marked
Mistake #6: Packing Medication Without a Medical Plan
Medical Preparation for a Remote High-Altitude Route
The EBC trail is remote, weather can delay transport, and altitude illness can worsen quickly. A first-aid kit is useful, but it is not a substitute for gradual ascent, symptom reporting, guide decisions, travel insurance, or professional medical care.
Before departure, discuss the itinerary and maximum altitude with a clinician who understands high-altitude travel—especially if you have a heart, lung, blood-pressure, sleep, or other medical condition. Review the CDC Yellow Book guidance on high-altitude illness. Medication such as acetazolamide or emergency drugs should be used only under an individualized clinical plan; do not copy another trekker’s dose or rely on medication to make a rushed ascent safe.
What to Carry
- Your regular prescription medication in original packaging, with enough for delays and a copy of the prescription.
- A compact blister and wound-care kit that you know how to use.
- Any clinician-recommended altitude, stomach, allergy, or pain medication, with written instructions.
- Oral rehydration salts and personal hygiene supplies appropriate to your needs.
- Travel-insurance details and emergency contacts accessible offline.
Tell your guide about symptoms early. Do not ascend with worsening altitude symptoms; descent and medical assessment may be necessary. Availability and quality of medication on the trail vary, so arrange critical personal medication before leaving Kathmandu.
Mistake #7: Inappropriate Layering System
Why Single Heavy Items Fail at Altitude
Many trekkers pack for Everest Base Camp the way they’d pack for winter at home: one heavy coat, one warm sweater, one pair of thermal underwear. A single heavy coat is difficult to regulate as wind exposure, walking pace, shade, and rest stops change how warm you feel.
The EBC trek takes you through multiple climate zones in a single day. You might start in a t-shirt at 2,800m in warm morning sun, add layers as you climb into shade and wind, then strip down again during a steep ascent, only to bundle up completely when you stop for lunch in a windy pass.
A proper layering system allows you to fine-tune your temperature regulation throughout these constant changes, making it easier to manage warmth and moisture without relying on one heavy garment.
Understanding the 3-Layer System
Layer 1: Base Layer (Moisture Management)
- Function: Wicks sweat away from your skin
- Material: Merino wool or synthetic (never cotton)
- Fit: Snug but not restrictive
- What to pack: 2-3 base layer tops, 2-3 base layer bottoms
Layer 2: Insulation Layer (Warmth)
- Function: Traps warm air for insulation
- Options: Down jacket, synthetic insulation, fleece
- Versatility: Should work alone or under shell layer
- What to pack: One puffy jacket, one fleece or softshell
Layer 3: Shell Layer (Weather Protection)
- Function: Blocks wind, rain, and snow
- Features: Waterproof, breathable, with ventilation zippers
- Fit: Roomy enough to fit over insulation layers
- What to pack: One waterproof jacket, one pair waterproof pants
Common Layering Mistakes
The “One Big Coat” Error: Packing a single heavy winter coat that you can’t regulate. You’re either too hot or too cold, with no middle ground.
Skipping the Shell Layer: Thinking your down jacket is enough. Wet down can lose much of its loft and may dry slowly, so protect it with a suitable shell and dry storage.
Wrong Base Layer Material: Cotton base layers that hold moisture and lose insulation. This mistake can be dangerous in combination with altitude and temperature swings.
Poor Fit Coordination: Layers that don’t work together—base layers too tight under insulation, shell too small to fit over other layers.
The Perfect EBC Layering Kit
Upper Body:
- Base: 2 merino wool or synthetic long-sleeve shirts
- Insulation: 1 down or synthetic puffy jacket
- Shell: 1 waterproof, breathable jacket with pit zips
- Backup: 1 fleece or softshell for variable conditions
Lower Body:
- Base: 2-3 pairs thermal leggings (merino or synthetic)
- Hiking: 1 pair convertible trekking pants
- Shell: 1 pair waterproof pants
- Backup: 1 pair warm hiking pants for tea houses
Extremities:
- Head: Warm beanie, sun hat, buff or balaclava
- Hands: Liner gloves + insulated gloves + waterproof mitts
- Feet: Hiking socks + warm camp socks + waterproof boots
Layering Strategy by Elevation
2,800-3,500m (Lukla to Namche):
- Base layer + hiking pants during the day
- Add insulation layer for morning/evening
- Shell layer for rain (common in this zone)
3,500-4,500m (Namche to Dingboche):
- Base layer + light insulation most of the day
- Full layering system for early morning starts
- Shell layer always accessible
4,500m+ (Lobuche to EBC):
- Multiple layers most of the time
- Full system for early morning and evening
- Constant adjustment throughout the day
Bonus: Pre-Trek Testing Strategy
Why Gear Testing Saves Treks
Even well-reviewed equipment can fit poorly or reveal practical problems in use: a zip may snag, boots may create hot spots on descents, or a sleeping bag may not fit its compression sack. Testing gives you time to adjust or replace an item before departure.
The solution is comprehensive gear testing in conditions as similar to your trek as possible. This doesn’t mean climbing a mountain, but it does mean using your gear in real hiking conditions for extended periods.
The 4-Week Testing Timeline
4 Weeks Before Departure:
- Complete outfit test: Wear your entire clothing system on a local day hike
- Boot break-in intensification: 4-6 hour hikes in full gear
- Sleep system test: Use your sleeping bag and pad in cold conditions
3 Weeks Before Departure:
- Pack loading test: Hike with your fully loaded day pack
- Weather system test: Test rain gear during actual rain or shower simulation
- Layering practice: Practice adding/removing layers efficiently
2 Weeks Before Departure:
- Final gear shakedown: One overnight trip with all your gear
- Timing tests: Practice morning packing routines and layer adjustments
- Problem identification: Final chance to replace or adjust problematic items
1 Week Before Departure:
- Final pack organization: Practice packing and unpacking efficiently
- Emergency gear access: Ensure you can quickly access rain gear, warm layers
- Last-minute additions: Only add items that proved necessary during testing
What to Test and How
Clothing Systems: Test your layering system during a full day hike. Practice adding and removing layers efficiently. Pay attention to:
- Overheating during ascents
- Cooling during breaks
- Layer compatibility and fit
- Pocket accessibility with layers on
Footwear: Your boots need testing beyond just walking around the neighborhood:
- Steep descents (hard on toes)
- Loose rock and uneven terrain
- Stream crossings or wet conditions
- Full day wear with trek socks
Sleep System: Test your sleeping bag and pad in the coldest conditions available:
- Overnight camping if possible
- Basement or garage sleeping in winter
- Pay attention to compression and setup time
Final EBC Packing Check
Before closing your duffel, compare every item with the current trip-specific equipment list. Check footwear fit, the sleeping bag’s comfort rating, waterproof layers, sun protection, personal medication, battery restrictions, and both porter and flight baggage allowances.
Test the clothing system and daypack on a long walk, then weigh both bags. For related planning, review our Everest Base Camp height guide, trek cost guide, and route map guide. The current Everest Base Camp itinerary remains the source for package-specific inclusions and support.
Frequently Asked Questions
Q: Can I buy most of my gear in Kathmandu instead of packing it from home?
A: Many items are available in Kathmandu’s Thamel district, including high-quality outdoor gear, but critical items like properly fitted boots, prescription medications, and personal comfort items should be purchased and tested at home. Use Kathmandu shopping for last-minute additions or replacements, not your primary gear strategy.
Q: What’s the one piece of gear you’d never compromise on for EBC?
A: There is no single universal item for every traveler, but footwear is difficult to replace once the trek begins. Choose a suitable pair early, test it with your trek socks, and address pressure points before departure.
Q: How much should I expect to spend on proper EBC gear?
A: Total cost varies widely depending on what you already own, the brands you choose and which items you rent in Kathmandu. Prioritize properly fitted boots, reliable weather protection and an appropriately rated sleeping bag. Ask for the trip-specific equipment list before buying a complete setup.
Q: Is expensive gear always better for EBC?
A: Not necessarily. Focus on proper function over brand names. A $50 synthetic base layer that fits well and wicks moisture effectively will outperform a $200 designer piece that doesn’t suit your needs. However, don’t compromise on critical safety items like boots, sleeping bags, and weather protection.
Q: What if I discover a gear problem during the trek?
A: Some replacements may be available in Namche Bazaar and larger villages, but selection, price and opening hours vary. Test critical gear before departure and carry a small repair kit. Tell your guide promptly if a gear failure affects warmth, footwear or safe walking.
Plan Your Equipment Around the Actual Itinerary
Our 15-day Everest Base Camp Trek starts from USD 1,599 and includes acclimatization days, Lukla flights, permits, trek meals, lodging, guide and porter support. Confirm the current equipment list and porter allowance before purchasing or renting gear.
Plan your Everest Base Camp trek
Once your kit is clear, the next step is matching the route and dates to your experience. Review the current Everest Base Camp itinerary or ask Exotic Mountains for a practical date-specific plan.